The Museum Blog
Category: Science
Here Comes the Sun
By Sarah Terry
Well, I am thrilled to report that the first session of our inaugural Maker Club at Woodman Park Elementary went wonderfully! It was so much fun, the kids are a blast to work with, and by the end of the hour, we had ten working Artbots bumping their ways around the room! One of our second grade students told her teacher afterwards, “You know, I never thought I would ever make a robot... and then I did!”
We had three-legged ArtBots, four-legged ArtBots, double ArtBots, BotBots (bots without marker legs, of course!), and more! It was quite the buzzy creative party!
And there's only one way for a Maker Club to celebrate this success... by making more stuff!
 Our next hands-on project involves one of my favorite ways to combine art and science – photography! I'm probably on the edge of the last generation that remembers using film cameras. I was just getting old enough to learn how to load the film myself when digital cameras became popular and quickly took hold of the market. Digital cameras are fascinating in their own right and have made photography more accessible than ever, but my mother is a photographer and I'll always have a soft spot for film... and the chemistry you can learn by understanding how it works!
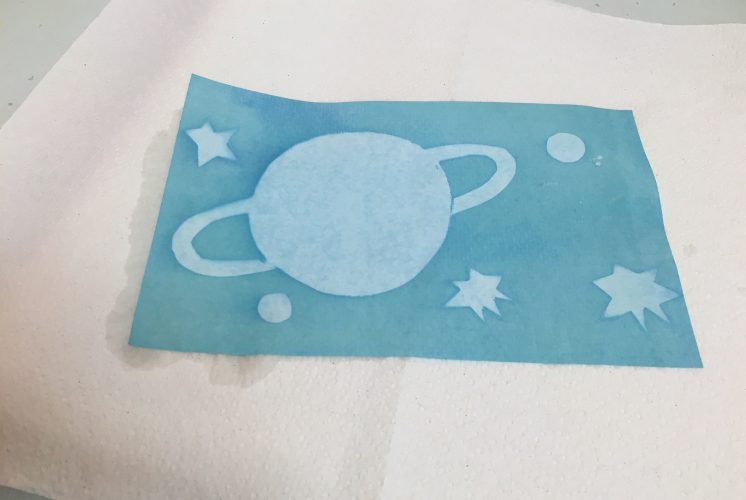
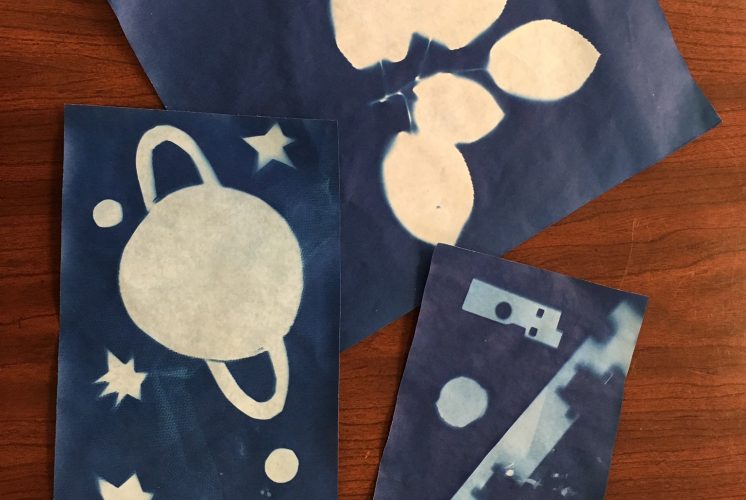
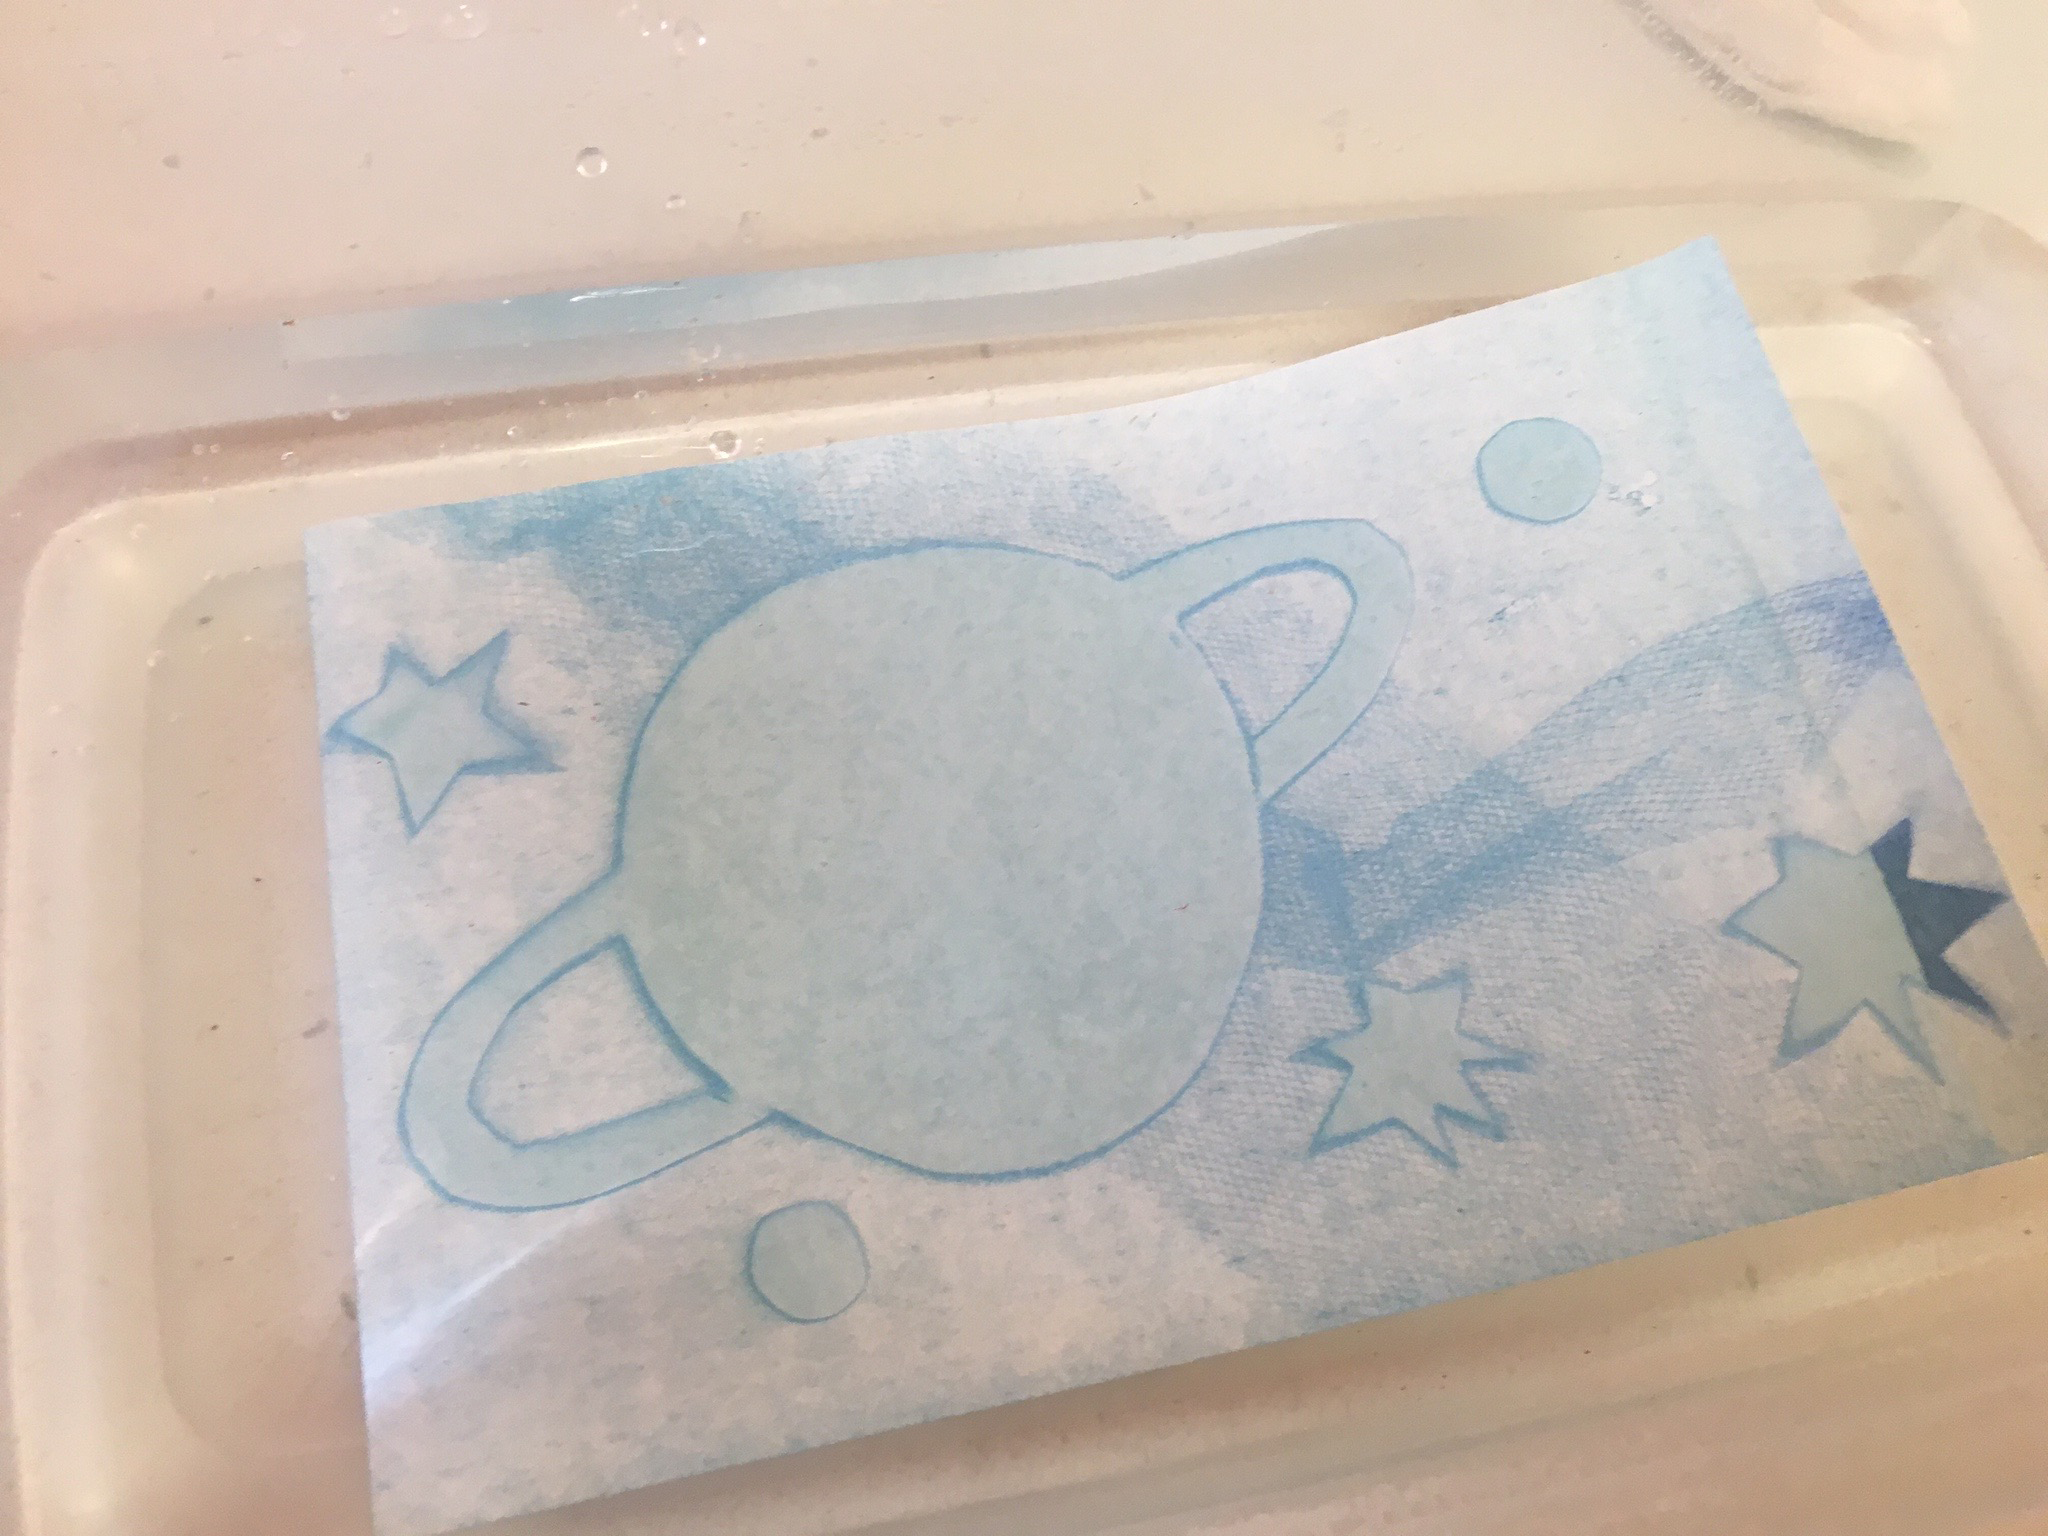
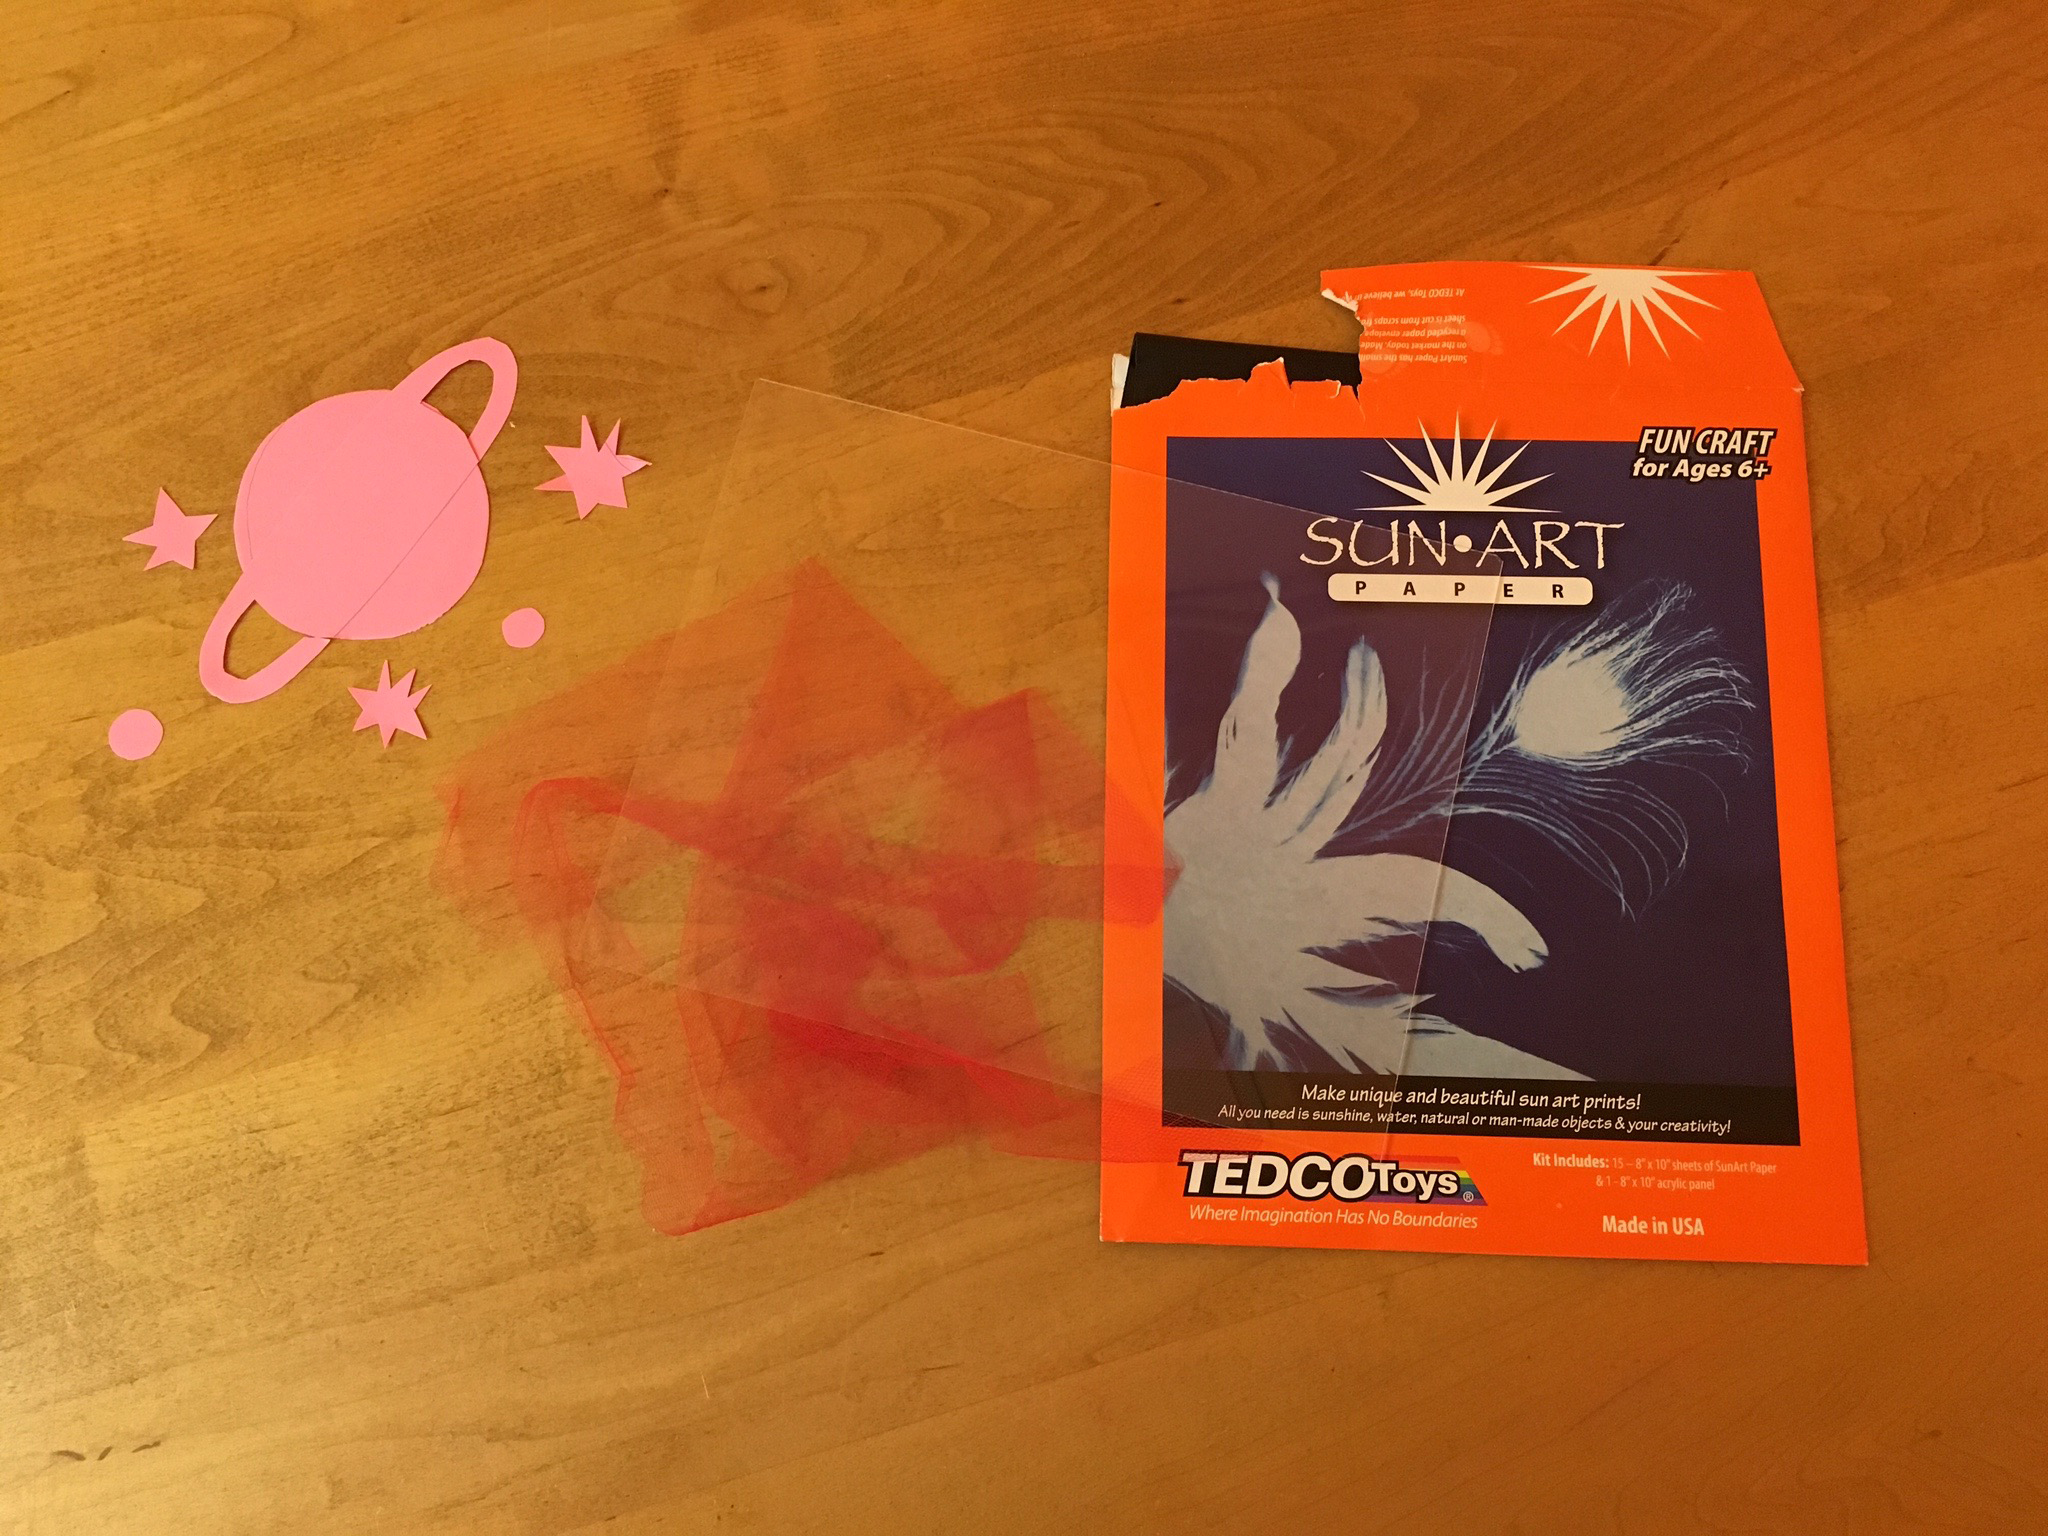
There are many types of film that use different chemicals to capture different colors of light, but we're going to be working with cyanotypes!
Cyanotypes, sometimes called sun prints, were invented in 1842 by Sir John Herschel. Does that name sound familiar? Herschel's father William is the man who discovered Uranus! John Herschel continued his father's work in astronomy – he named seven of the moons of Saturn, and four moons of Uranus – but he also made large contributions to the field of photography.
Cyanotypes were originally used to reproduce notes and diagrams (their bright color is where we get the term blueprint from!). The first person to use the process to make photographs was Anna Atkins, an English botanist and friend of John Herschel. She is considered by some to be the first female photographer! She used the process to document different kinds of algae and seaweed, and published a book called (fittingly), Photographs of British Algae: Cyanotype Impressions. Technically, what Atkins created were photograms. Photograms are made by contact printing – she put pieces of algae directly on the paper and exposed it to create her images!
We're going to be making some photograms of our own today!
Now, I bought already-treated cyanotype paper film, but you can actually make the film yourself! This process involves chemicals, so you'd want to make sure you have goggles, gloves, a mask and a well-ventilated area to work in! This article documents the process, and the supplies you'd need.
 Materials:
- Sunprint paper
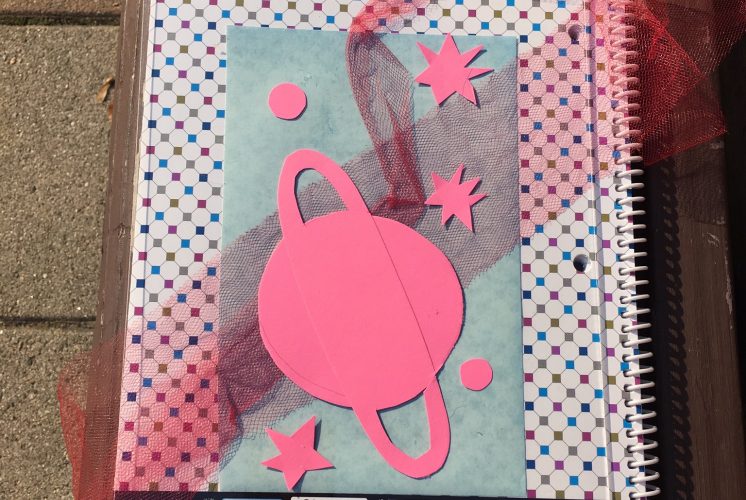
- Supplies to make your image. Now this could be all kinds of materials – I cut designs out of paper, and used some mesh, but you can use leaves, shells, Legos, anything you think has a cool outline!
- Plexiglass sheet
- Plastic bin
- Vinegar (or lemon juice!)
- Water
Now cyanotypes are made through a chemical reaction with UV or ultraviolet light! The chemicals in the paper – ammonium iron (iii) citrate and potassium ferricyanide – react with UV light to create an insoluble blue dye! Then you develop the film in water and a little vinegar, and your print is finished!
To begin, make sure that you are in a room where sunlight can't reach you! You don't want any UV light to touch your print before you're ready. Luckily, indoor lights aren't powerful enough to produce ultraviolet light, so you don't need to work in a darkroom, like you would for ordinary film.
Get the complete step-by-step instructions here in a handy dandy printable PDF
Check out this video to see the process in action!
The Wacky Scientist Reflects on his Career
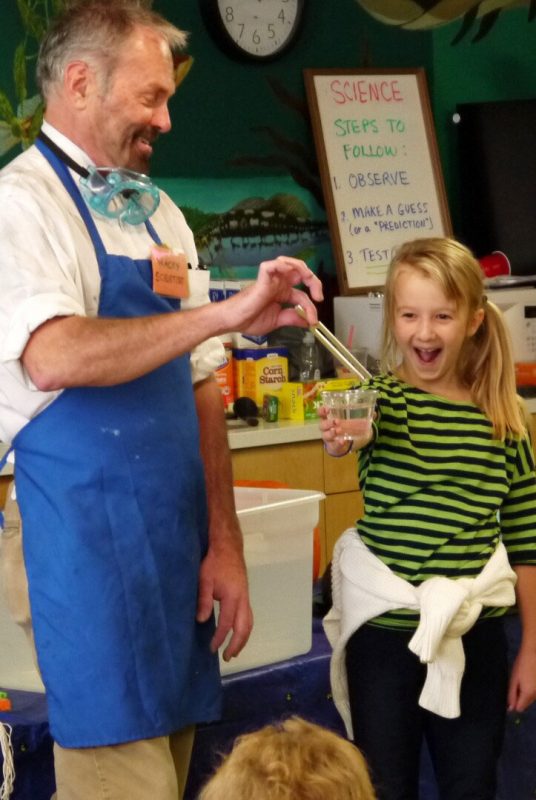
By Doug Tilton
I have had the honor of being the “Wacky Scientist” for the Children’s Museum of New Hampshire for about 14 years now and I spend all year preparing for and looking forward to the October Not-So-Spooky Spectacular! I’m actually the second “Wacky Scientist” to hold this position. The first Wacky Scientist was a former employee named Bill Stroup. He and Jane, our current President, came up with the slightly misleading moniker of “Wacky Scientist.” I’ve never thought of myself as particularly “wacky” (but I suppose I have my moments). In my pre-wacky days I actually did a lot of theatre and directing, which I think has served me well when trying to keep my young audience attentive and entertained.
I had presented science concepts to children’s audiences for years and directed others to do it, but still, the first time I did it as the Wacky Scientist was still a new experience. I relied on my fellow educators to help develop the science experiments that have become a signature highlight of our Halloween celebrations. Then as time went on, I started creating my own experiments and made sure that each show was different and unique!
A few of my favorite experiments over the years have included anti-gravity in a jar, “sink or float,” giant gyroscope, Coke and Mentos explosion and screaming balloons! Of course there are always unexpected surprises. Sometimes those surprises come in the form of costumed kids who want to talk to their friends through my experiments, or perhaps think they already know all about what I’m doing. THEY are the ones I make into my first assistants! Hey, every Wacky Scientist needs a Wacky Assistant. It’s in the bi-laws.
Of course, being a Wacky Scientist, or a Wacky Assistant, isn’t all fun and games. Occasionally it requires some serious dedication and risk taking. One year I was working the kinks out of a fantastic experiment where I used a bungee cord to drop a raw egg from the ceiling onto my assistant’s face! We carefully measured everything to make sure that the bungee would stop the egg from hitting his face at the very last second. Let’s just say, the Wacky Assistant’s dedication was tested that day, as were my Wacky nerves. But in the end, we measured correctly and didn’t end up with any egg on our face, literally or idiomatically.
Are you bringing your wacky kids to this year’s Not-So-Spooky Spectacular?
Pi Day 2015
Yesterday, March 14th, in addition to being Albert Einstein’s 136th birthday, was Pi Day. March 14th = 3.14 = Pi Day. Since Physicist Larry Shaw put together the first official Pi Day celebration in San Francisco back in 1988, the deliciously mathematical holiday has only grown exponentially in popularity.
Last year, we focused more on the delicious side of Pi Day festivities. This year? We got down to pi business. Because many of our visitors are still in elementary school, trying to explain pi exclusively with terms like “irrational number”, “mathematical constant” or “Madhava-Leibniz series” isn’t exactly the most fruitful plan of attack.

So how can you make the math fun? Multiplication? No problem. Geometrical shapes? Sure. But the ratio of a circle’s circumference to its diameter? That’s a bit bigger of a fraction to follow!
Enter Museum Educator Sarah Terry. I asked Sarah, who returned to CMNH at the end of 2014 after first joining our team in October of 2011, how she approached a subject that seems, on the surface, to be rather dry and difficult to build a day of fun around.
“I’ve always thought math was a lot of fun,” Sarah said. “There’s something so satisfying about working with problems and equations that can be solved. In the humanities, you don’t come across too many situations where there is a definitive right answer. It tends to be based on opinion. Well-reasoned and supported opinions, but still debatable. The rationality of mathematics always seemed comforting in comparison.”
But can Rational = Interesting? Can Rational = Fun? Sarah was confident it could be both.

“When you come across something like pi, which is an infinite number with no apparent pattern or repetition, it’s pretty mind-blowing,” admits Sarah. “How can something as crazy and enormous of a number that’s been calculated out thus far to over 12 trillion digits also be considered a mathematical constant? Every circle that has been or ever will be created will find that its circumference divided by its diameter will be pi. It’s unwieldy and baffling and I looked forward to coming up with activities that could show our visitors that things as awesome as pi actually make math – yes, math – pretty cool!”
Using CMNH’s Colorful Classroom space as her home base, Sarah taught visitors young and old about pi. Some had never heard of it. Some had learned about it in school but had forgotten the specifics. Some were wearing Pi Day shirts. Using a variety of colorful craft activities coupled with the promise that if you located her over the course of Pi Day and recited a fact about Pi, Sarah would paint the pi symbol on your cheek, visitors left yesterday with a newfound appreciation – and hopefully, enthusiasm – for the wild, wacky, infinite constant that is pi!
We hope you and your family had a Happy Pi Day and look forward to you spending Pi Day 2016 with us here at CMNH!
 Circles, circles, everywhere!
“Pi lets us show off the oddball side of math and lets us stretch our imaginations,” Sarah said.
 What’s a Pi Chain? Good question! Here’s the answer: 0-9 are each represented by a color. Following the order of numbers in pi, can you make an accurate chain that is correctly represented by the 10 colors? Can you make a longer Pi Day Pi Chain than your friends and family?


 Even the streamers never rested from the continual recitation of pi!

When Ice is Nice
Embracing the cold . . . all year long
The weather in New England is always interesting on any given day, but this winter has been especially memorable. When it’s not snowing close to two feet of snow causing people (and cars, buildings, Giant Blue Crabs, etc.) to be totally buried in the fluffy white stuff, it’s in the mid-50’s with families walking, jogging and playing outside.
At CMNH, we offer a safe and warm facility for families to enjoy – especially on those sub-zero Polar vortex days we’ve recently experienced. On moderate winter days, one of our favorite activities is guiding families into Henry Law Park in front of our building and creating Snow Art!
 Our visitors use spray bottles full of non-toxic watercolor paint and water to decorate the landscape in Henry Law Park
But whether the weather is freezing, windy, hailing or sizzling, one of the most popular indoor activities we run at CMNH is Ice Art. When we set up larger Ice Art projects (consisting of several tubs of ice) they can be worked on in the Muse Studio, while our smaller ones (usually one tub with one large or several smaller pieces of ice) can be found in the Naturalist Study near the CochecoNature exhibit on the first floor of the museum.
Parents & children (and staff!) experiment with cups of colored saltwater to see how their actions affect the ice.
– Does the salt make the ice melt faster or slower?
– What is the advantage of using a pipette to administer the solution?
– Do colors mix the same way on ice/water as they do on paper?
– How does an items density affect how it freezes inside the ice?
– How much time do you think it will take to free a trapped treasure from the ice?
– How do you make stripes of color – or a rainbow – in the ice without the colors mixing?
Through the help of our visitors, here’s some knowledge we’ve gleaned thus far in our years of ice exploration:
– Some dice floated to the top before freezing while some sunk.
– Glitter always floats before freezing.
– We had to weight the plastic sharks so they would freeze in the center of the ice.
– Ribbon is fun to freeze. Fabric is not fun to freeze.
– Pencils are fun to freeze. Pens are not fun to freeze.
– Plastic bugs look cool trapped in ice. Plastic food looks gross trapped in ice.
– Colors that slowly drip from one section of ice to another can create cool swirling effects. Too many colors in the ice at once causes brown and gray water. Yuck.
– Freezing different colors side-by-side takes a few days as each color must be frozen on its own first.
– The plastic human brain mold was our most popular ice shape. (Sadly, human brain mold developed a crack last year and had to be retired.)
– Visitors most favorite trapped ice objects are – hands down – plastic dinosaurs of all shapes and sizes.
Ice Art is an inexpensive, fun activity that can be done at home with Plastic containers, small cups, pipettes or paint brushes, table salt and watercolor paint or food coloring (but we recommend the paint as it washes off easier). The bigger the shape that you’re freezing, the more time it will need in the freezer. Museum Educators often set up their ice projects at the end of the museum day to be ready for the following morning.
Enjoy this short video of some of our most interesting ice art that we’ve seen at CMNH!
Zach once ate so many coconut flavored popsicles in a row that everything he ate for six months tasted like coconut.
What happens if … ?
 We go through a lot of baking soda and vinegar in my house. We’re not cooking with it. We’re not cleaning with it. We’re mixing “potions” with it, erupting volcanoes, mixing it with food coloring and painting with it. Splashing salt on top to see what happens. Raiding the recycling bin and building courses for the bubbly liquid to travel down. (I highly recommend building such courses in a bathtub or on an outside deck!)
Although I’ve been an educator both in schools and the Museum for nearly 20 years, I’ve received some great insights into the way kids learn about the world observing my own kids try to figure out “what happens if” and “how does this work.”
 The author's son in a previous winter when snow was abundant!
This past weekend, my 9-year-old son was lamenting the pitiful ½ inch of snow on the small hill he likes to sled on in the yard. “That’s a problem,” I said. “Can you think of a solution?” After trying to relocate snow from other parts of the yard to no avail, he asked for a bucket. His solution: to pour bucket-loads of water down a path on the hill. How long will this take to freeze? How many layers of ice do I need to put on the hill to make it thick enough to hold the weight of me and my sled without cracking? Does the water freeze faster if I put cold water in my bucket?
My son was playing, getting messy and having fun, but most of all he was determined to have a place to sled by the end of the day (which was how long it took for the multiple layers of ice to freeze). Did he realize that he was conducting experiments? Forming hypotheses? Using scientific reasoning? No, but that’s okay.
Here at the Museum, we may not have the icy hill in the backyard, but we know we’ve done our job when we observe kids (and adults) engaged in asking questions, experimenting, or creating something new together. Are you looking for some “what-happens-if” fun during the cold winter months? We’d love to have you visit and experiment with us.
And check out these websites for some science inspiration you can try at home – recommended by Museum colleagues through the Association of Science and Technology Centers:
“The SciGirls website, http://pbskids.org/scigirls/, is awesome! It’s great for girls and boys.”
“www.edheads.com is a great website that has some really fun kid-friendly interactives with accompanying teacher guide (including virtual surgeries, crime scene investigations and nanoparticle development.”
“Carnegie Science Center has a website as part of our girls program at www.braincake.org.”
Activities for school, home or group projects on a variety of science topics: http://www.kids-science-experiments.com/