The Museum Blog
Category: STEAM
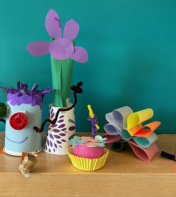
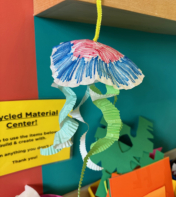
Make Recycled Art This Earth Day
Did you know April 22nd is Earth Day? In 1970, people organized a national demonstration to raise awareness for environmental issues. Rallies were held across the country, before the end of that year the government had formed the Environmental Protection Agency to help make sure our planet was taken care of as best that we could for years to come. By 1990, Earth Day was being celebrated by over 140 countries around the world.
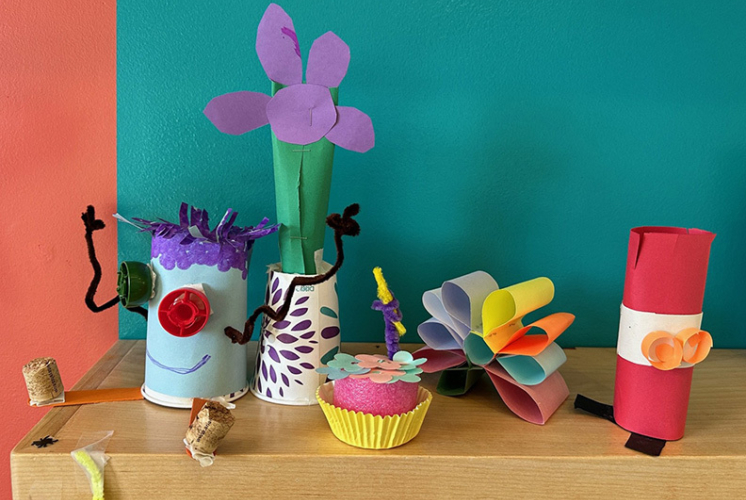
You might have heard the phrase, REduce, REuse, REcycle, as a way to help explain ways we can help the Earth and keep the environment clean. This is something we can even do when creating artwork! In our Muse Art Studio we are creating Recycled Art, but it’s also something you can do at home!
To start all you need are:
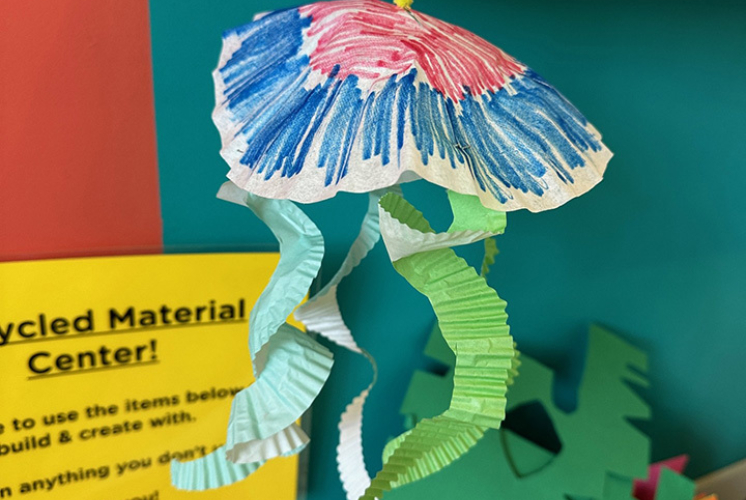
Some recyclable or reusable items, like bottle caps, cardboard, paper cups, pipe cleaners, or cupcake liners
You can add markers, scissors, glue, or staplers to help decorate your art
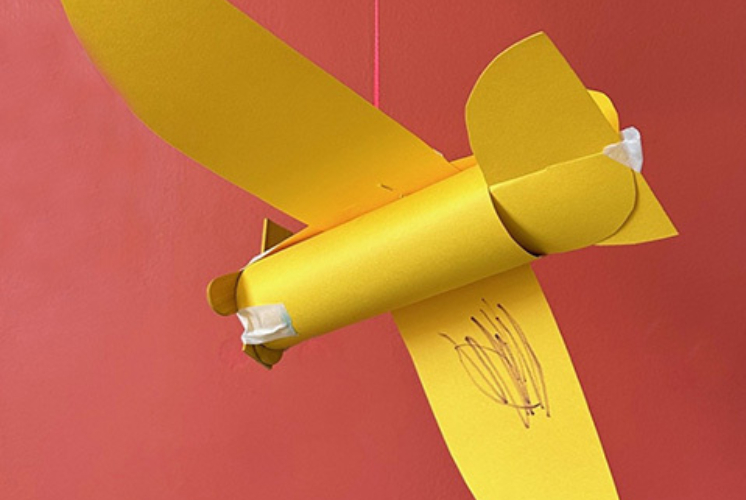
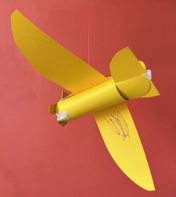
You can make something to use later, like an airplane to play with or a bird feeder. Or you can make something abstract with these items. The great thing about recycled art is that it can be anything you want. Making art in an open ended way like this is called process art. It’s a great way for kids to explore self-expression and help with fine motor skills.
Making recycled art during April is a great way to teach kids about recycling and reusing everyday items that might otherwise end up in the trash, and opens conversation with your child to talk more about Earth Day and why it is important!
Spooky Science: Disappearing Ghosts
Disappearing Ghosts
Materials Needed:
- Biodegradable packing peanuts (made of corn!)
- Dark colored marker
- Pipette or paintbrush
- Small cup of water
- Tray/plate/cookie sheet
Instructions - Set-up:
- Use your marker to draw ghosty faces on several biodegradable packing peanuts
- Invite your young scientist(s) to draw some faces, too!
- Place ghosts, small cup of water, and pipette on a tray, plate, or cookie sheet
Instructions - Activity:
- Explain to young scientists that today they are going to make some ghosts disappear!
- Invite them to touch the ghosts and guess what material was used to make them
- Talk about the texture, the weight, and ask if it reminds them of anything they’ve seen/touched before
- Show them how to use their pipette and tell them to carefully drip some water onto their ghosts
- What happens?!
- You can also use a paintbrush to carefully drip water
- What happens?!
- Eventually they will notice that their ghosts are shrinking and “disappearing” into a pool of water!
- Ask them what happened? How do they think that happened? Do they think the ghosts really disappeared? Where did they go?!
The Science:
Although it may have LOOKED like the ghosts were disappearing, they were actually dissolving! The packing peanuts are made of corn, which dissolves in water. If you put a handful of these packing peanuts into a jar of water and shook it, they would completely dissolve--leaving some cloudy white water behind.
Packing peanuts are traditionally made of styrofoam which takes millions of years (we think!) to biodegrade and become dirt in the earth. These packing peanuts biodegrade almost instantly, making them much more environmentally friendly--and they also make an awesome science experiment!
Bonus Activity: Monster Ice!
Can’t get your hands on biodegradable packing peanuts? No worries! Try this fun experiment instead.
Materials Needed:
- Plastic container (freezer safe)
- Water
- Googly eyes or other Halloween trinkets (spider rings, erasers, etc)
- Small cup with warm salt water
- Pipette or paintbrush
- Tray or cookie/baking sheet
- Red & yellow food coloring (optional)
Instructions - Set-up:
- The night before the activity, or several hours before, put water into your plastic container.
- Add yellow and red food coloring to make orange, if you’d like
- Put in the googly eyes or other Halloween trinkets
- Freeze!
- Place plastic container with ice* on a tray with cup of warm salt water & pipette/paintbrush
- *You might be able to get the ice out of the container, if not--start with the ice still in the container and as young scientists add water & salt, you will easily be able to get the ice out!
Instructions - Activity:
- Invite young scientists into the experiment area
- Ask them what they see!
- Encourage young scientists to use the pipette or paintbrush to drip warm salt water onto the ice and “free” the halloween trinkets
- Ask: What is happening?
- Mention that the water is warm and has salt in it--ask how they think this might help to melt the ice
- Continue adding water until the trinkets are unfrozen!
The Science:
- Salt lowers the freezing point of water. Ice melts faster when salt is added as the salt lowers the freezing point of the ice, this is known as freezing point depression. The more salt you add the lower the freezing point.
- This is why we use salt on roads in the winter to help melt the ice and make them safe!
Spooky Sparks
by Meredith Brustlin, CMNH Educator
Materials Needed:
- Oven safe dish - reusable or disposable aluminum
- Steel wool
- 9V battery
- Jug of water - just in case!
Instructions & Safety:
- Since this activity does produce smoke, you may want to set-up outside. Just be sure if you do this experiment outside that it is not a windy day.
- I did this experiment inside my house several times and there was not enough smoke to set off any smoke detectors! HOWEVER I had coarse grade steel wool so the circuits & smoke were far less significant. If you have FINE grade steel wool, do this experiment outside.
- If you have young scientists--do this experiment as a demonstration (“I’m going to do it, and you get to watch!”)
- If your scientists are older, they can do this experiment but make sure they are closely supervised.
- The steel wool produces sparks & fire
- The 9V battery will eventually get fairly warm to the touch.
Set-up:
- Pull apart your steel wool so that it is in a very thin layer
- Place the steel wool into your oven safe dish or container
- Place the battery and jug of water nearby.
Activity:
- Take time at the beginning of this experiment--whether you are doing it as a demonstration or young scientists are participating--to discuss safety.
- Ask scientists what they see. Invite them to feel the steel wool. What does it feel like? Does it remind them of anything?
- Explain that today you are going to make spooky sparks by creating circuits within the steel wool.
- Use the battery to gently touch down on the steel wool---watch as sparks fly through the steel wool creating a chemical reaction!
- Keep creating circuits! Eventually you will “use up” all the steel wool and the circuits won’t work anymore. Also be conscious of the battery warming up--it’s working hard!
The Science:
We are seeing a chemical reaction take place in this experiment, Anytime something burns, we are seeing a chemical reaction! This type of chemical reaction is called a combustion reaction.
You are seeing the steel wool react with oxygen and in this case it is forming iron oxide.
We were also seeing circuits at work! When both battery terminals touch the steel wool, the electrons from the battery move rapidly through the steel wool and make a complete circuit. This electrical current is heating up the wire (to ~700 degrees!) and this heat causes the iron to react with the oxygen surrounding the little strands of steel wool. This reaction is what causes the sparks (homeschoolscientist.com).
Bonus Activity: Fizzy Pumpkins
Materials Needed:
- Baking Soda
- Water
- Red & yellow food coloring
- Small piece of cardboard
- Tray or cookie sheet/pan
- Pipette or paintbrush
- Small cup of vinegar
Set-up:
- Make your fizzy pumpkin!
- Measure out about ½ a cup of baking soda into a bowl
- Slooooowly add water until the baking soda comes together to form a moldable paste
- Add yellow and red food coloring to make orange and mix together
- Use your hands to shape the baking soda into a ball
- Push in the piece of cardboard in the top to look like the stem of a pumpkin
- **You can either make your pumpkin immediately before doing your experiment, or make it the night/several hours before**
- If you make it right before your pumpkin will be “mushy” but still hold its shape
- If you make it hours before doing the experiment, the baking soda will dry out and become hard as a rock!
To set-up your experiment area, put the pumpkin on a plate or tray and set the cup of vinegar and pipette/paintbrush nearby.
Activity:
- Invite young scientists into the experiment area
- Ask them what they see!
- If you’d like, you can tell them they can carefully touch the pumpkin with one finger and guess how it was made/what material was used to make it.
- Introduce the vinegar and pipette/paintbrush and tell young scientists to carefully drip some vinegar onto their pumpkin
- What happens?!
- Keep playing until the pumpkin turns into pumpkin mush!
The Science:
This is a classic acid and base experiment. When vinegar (an acid) interacts with baking soda (a base) we get a chemical reaction. In this case we’re producing a gas (carbon dioxide) and lots of fun fizzing and bubbles!
Spooky Science: Bat Rockets
by Colie Haahr, CMNH Educator
We did a mini rocket experiment for this Spooky Science video, and made a bat straw rocket. You can try both at home! For the mini bat rocket, it's important to have supervision and assistance from a grown up. This experiment uses medicine, and children should not try this without help from a grown up.
Bat Rocket Experiment:
Materials needed:
- Alka seltzer or similar effervescent medicine
- A film canister with a tight fitting lid
- Water
- Optional: a bat to add to your rocket. We used a laminated picture in the video
Set up:
Set up outside or use a tray indoors in an area that's easy to clean up
Experiment:
This experiment happens quickly! So make sure all eyes are on the rocket once the ingredients are inside.
Break off a piece of the alka seltzer and place it inside the film canister. Add water filling the container less than half way. Quickly replace the lid of the canister, and flip it over so that the lid is on the ground (or tray). Wait less than a minute, and the canister will launch into the air!
How does it work?
The alka seltzer mixes with water and creates bubbles. Another way to describe it is that a solid and a liquid mix together and create a gas. In the small canister there is only so much space for the water and the bubbles to fit, so the pressure from the bubbles pushes the canister up into the air! The bubbles are carbon dioxide gas, and as the gas is trying to escape and has nowhere to go, it pushes the lid off of the canister. Since the canister was placed upside down, the canister flies up into the air rather than the lid just flying off (that will happen if the canister is placed right side up!). This experiment is similar to a baking soda and vinegar experiment, and that's because some of the same ingredients are in the alka seltzer- citric acid and sodium bicarbonate.
Bat Straw Rocket Activity:
For a less messy version of bat rocket fun, try making a bat straw rocket!
Materials needed:
- Cardstock
- Bat template
- Pipette
- Tape
- Scissors
- Straw
Instructions:
- First, print the bat template on the cardstock, or use a permanent marker to draw a bat
- Color the bat in with markers or crayons, and cut it out
- Cut a pipette so that the larger end can be used for the rocket (the part you squeeze)
- Tape the pipette piece onto the back of the bat cut out
- Place the pipette piece onto a straw- this can be a reusable straw, paper straw, or plastic straw
- Blow into the straw with is angles slightly upward- the bat should "fly" off of the straw
How does it work?
The pipette piece is closed off at the top, so when you blow into the straw, the air has nowhere to go. The pressure from blowing into the straw makes the bat fly off the straw, and go through the air for a bit!
We first learned about this activity from Bug and Buddy, and they have a free printable bat template that can be used for this project. There are also some great pictures of the process to make the rockets, and a video. See the link in the reference section below! This activity involves pressure and forces similar to the bat rocket experiment, but it is less messy and can be tried over and over again. Have fun!
References:
https://www.imaginationstationtoledo.org/education-resources/diy-activities/alka-seltzer-rockets/
Wacky Art: Windsock Craft
By Meredith Brustlin, CMNH Educator
I love this windsock craft! It’s an art project that is accessible to all ages and abilities - and you get to sneak in a little bit of science. Here’s how to make your own windsock:
Materials Needed:
- Paper (printer paper, cardstock, construction paper, etc)
- Markers or crayons
- Crepe paper streamers or tissue paper cut into long strips
- Tape or glue
- A stapler
- A hole punch or scissors
- String or yarn
Directions:
- Invite little ones to decorate their piece of paper with the markers or crayons. If you have stickers or stamps, you could use those, too!
- Once their paper is all decorated, flip it over so that you are looking at the back
- Tape or glue the streamers onto the bottom end of the paper
- If you used glue, give it a few minutes to dry
- Pick up the paper and curl it into a tube/windsock shape
- Staple on the top and the bottom
- Hole punch or cut small holes on either side of the top
- Put your string through the holes
- Hang up your windsock!
The Science:
- The science behind windsocks is pretty simple...if you put your windsock outside, you’ll be able to tell a few things:
- If the wind is blowing
- How much the wind is blowing
- Which direction the wind is coming from!
Pete the Cat Party- Painting Guessing Game
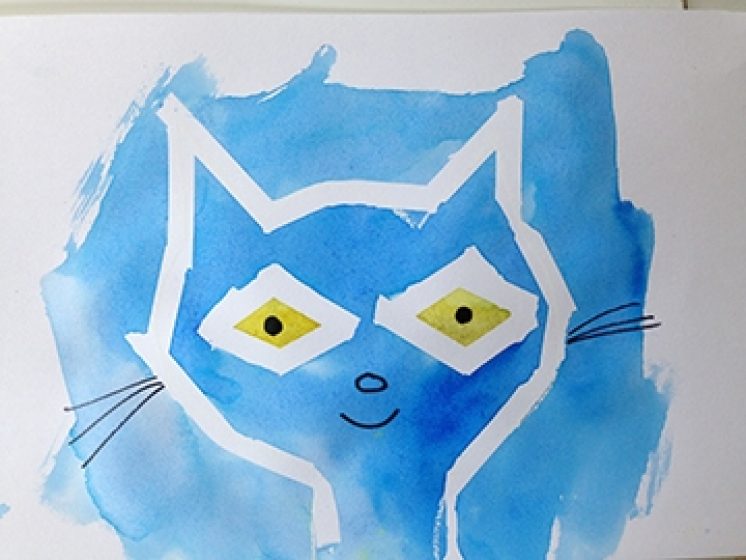
By Colie Haahr, CMNH Educator
Thank you for checking out our Pete the Cat Party video! If you followed along with the storytime, you know that Pete the Cat LOVES his white shoes, and his red shoes, and his blue shoes! He is even okay with his wet shoes! This blog post will walk you through setting up an art project guessing game, where kids can guess what Pete stepped in to change the color of his shoes.
Materials:
- Paper- cardstock, construction paper, sketch paper
- Watercolor paints
- Paint brush
- Water cup
- White crayon
- Drawings prepped ahead
Directions:
Prep Ahead: For this project, you will need to draw some pictures with a white crayon ahead of time. Each drawing should be an item that is mostly one color, and that we can imagine might change the color of Pete’s shoes. Here are some ideas:
- Green: Spinach, Peas, Avocado
- Blue: Blueberries
- Purple: blackberries, grapes
- Red: Strawberries, Raspberries, Cherries
- Orange: Oranges, Carrots
- Yellow: Buttercups or Dandelions
- Brown: Coffee, Chocolate Cake
- Black: Olives
- Draw a picture of each item on a piece of paper using a white crayon
- Set up the water colors, paintbrush, and water cup for painting
- Play the game! Ask, “what do you think Pete the Cat could step in to change his shoes a different color?” Take a few guesses.
- Now, choose one color and paint one of the pieces of paper, and see what happens! The picture you made with the crayon should magically appear
- The white crayon creates a wax resist, so the watercolors will not soak into the paper, and you can see the drawing in white.
- You can give away what color to paint each item, for example, “try painting this one red, and guess what is in the picture,” or let kids choose a color, and then ask “Is that what color strawberries are, or are they a different color?”
- Play the game for each picture you made ahead of time.
Optional: kids can try coloring with white crayons to create a wax resist, then painting over it.
Optional: you can also do this activity using tape to create an outline of Pete the Cat, and paint over it, then take the tape off when the painting is dry to see the design.
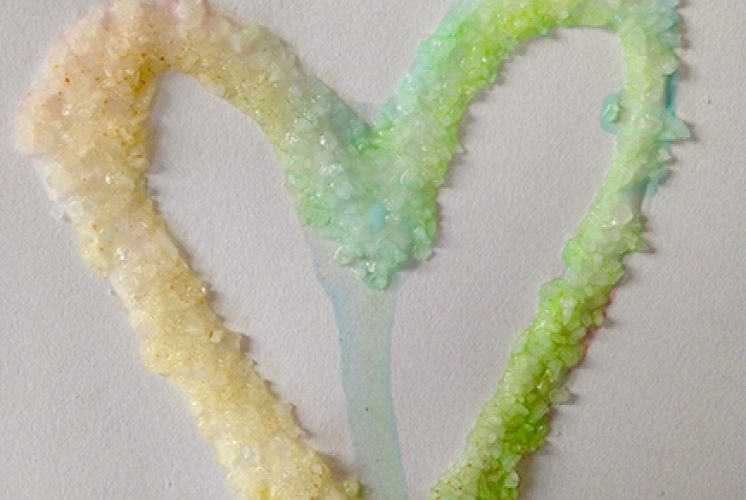
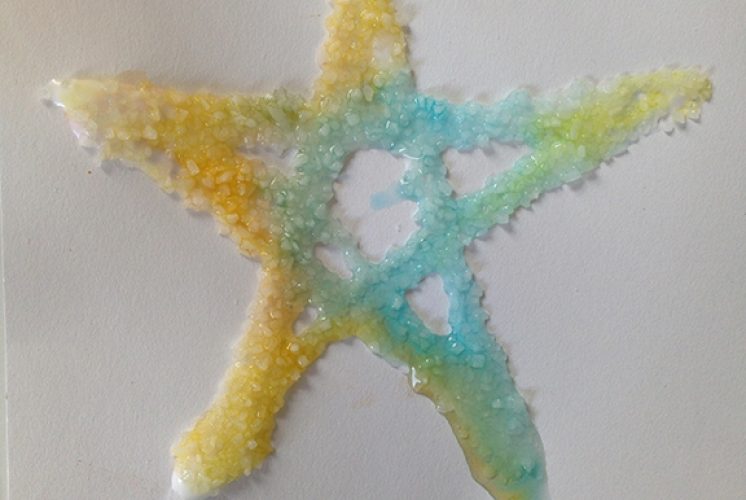
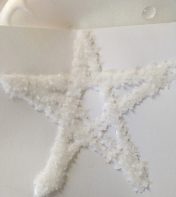
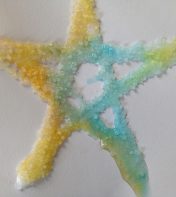
Wacky Art: Raised Salt Paintings
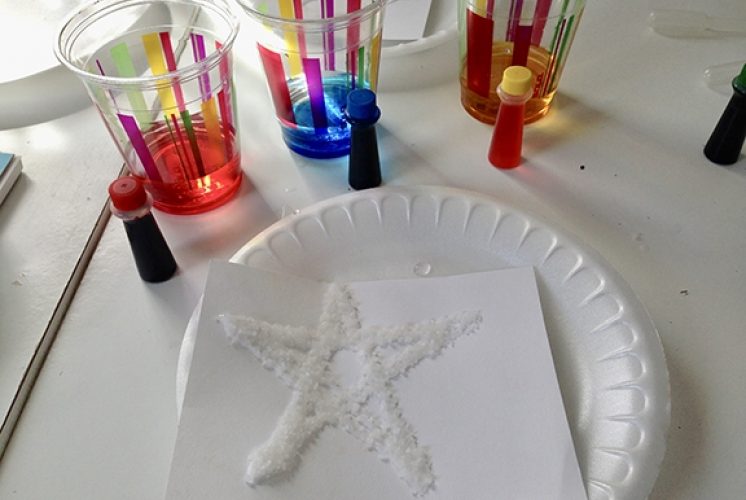

By Colie Haahr, CMNH Educator
This fun art project can double as a science project! Kids make designs with liquid glue, add salt, then carefully add some colors and watch what happens! The liquid water colors should be absorbed by the salt, and move along the glue and salt design right before your eyes!
Materials Needed:
- Card stock or thick paper, construction paper works
- Tray or plate work surface
- Salt in a dish with a spoon to scoop it
- Liquid glue - that kids can use on their own
- Liquid watercolors or food coloring mixed with water
- Pipette, eye dropper, or spoon
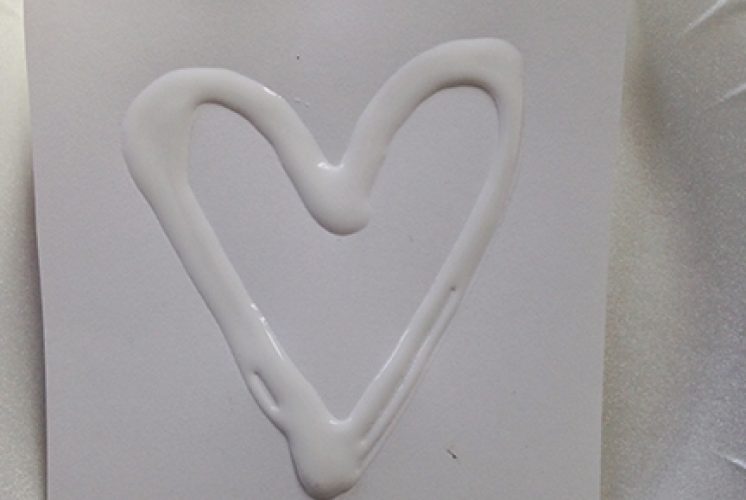
Directions:
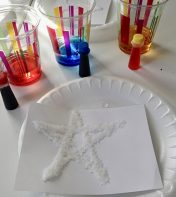
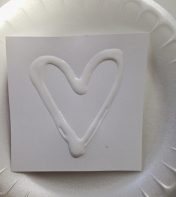
- First, make a design on the cardstock using only glue- lines work well!
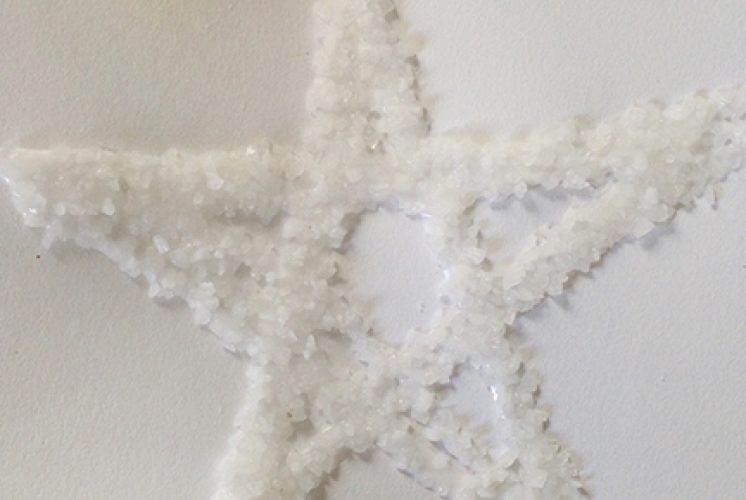
- Next, add salt to the glue so that the glue design is covered in salt. Gently pour the extra salt back onto your tray or into the trash. Similar to what you would do with glitter and glue- you want the salt covering all of the glue
- Use the pipette to carefully add colors to your design. Only add a little bit of color at a time so you can see the colors move. Only add color to the glue.
- The color should magically spread on your design as the salt absorbs the liquid
- Let your project lie flat to dry, otherwise the colors will spread where there is no glue!
Experiment:
- Here are a few ideas you can try to make this art project into an experiment:
- Try using different kinds of salt, and see which kind works best (larger or smaller grains). Make a prediction before you try each one!
- Try this project with sugar and with salt (use the same design for each), and see which works better, or if sugar works at all.
- Try color mixing by using primary colors to do the project. Can you get them to mix? Why or why not?
Links:
www.cbc.ca/parents/play/view/art-science-salt-glue-watercolour-experiment
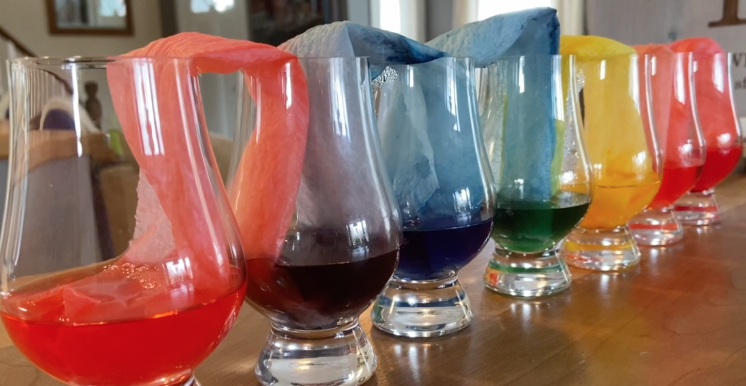
Walking Rainbow Experiment
By Meredith Brustlin, CMNH Educator
We share a lot of different science experiment projects at CMNH. Many of these experiments have instant results - things like vinegar and baking soda bubbling, popcorn dancing, and invisible ink appearing. What I really like about this “walking rainbow” experiment is that it takes some time to see the results (as in, it takes hours to fully see the results!) Although it may not be as exciting in the moment, it is a perfect experiment to practice making predictions and thinking like a scientist. It really gives young scientists time to think and hypothesize and even change their guesses throughout the day.
To make your own rainbow you will need:
- 7 clear cups--these can be glass or plastic, just make sure they are perfectly clear (not colorful)
- Water
- 6 paper towel pieces (this could be three large sheets cut in half, or 6 of the little half sheets)
- Primary colors of food coloring or liquid watercolor
Set-up:
- Set out the 7 cups in a line
- Fill cups 1, 3, 5, & 7 about halfway with water
- Leave cups 2, 4, & 6 empty
- Fold your six paper towel pieces in half lengthwise and then in half again. Take that long skinny strip and fold it in half so that it can stand up in the cups (pictured above)
- Invite young scientists to help you add some food coloring to the cups.
- Ask them--what is the first color of the rainbow? Red! Add about 6 drops of red food coloring to the first cup.
- What is the second color? Orange! That cup is empty though, so we will skip that one.
- Add yellow to the 3rd cup
- Skip the 4th cup (green)
- Add blue to the 5th cup
- Skip the 6th cup (purple)
- Add red to the 7th cup and ask your scientists why they think you may have done that…!
- Next, carefully place your paper towel pieces in between each cup so that they are resting in the colorful water.
That’s it for set up! Now it’s time to think like a scientist!
Ask your young scientists…
- What do you think will happen with the cups?
- Why do you think we left some cups empty?
- What do you know about primary colors?
- How do you think what you know about primary colors (that they make secondary colors) will come into play in this experiment?
- What do you notice is already happening with the paper towel pieces and the water?
Feel free to have your scientists write or draw what they are seeing!
This experiment will take awhile to completely finish and make the rainbow design. It’s a good idea to either do this experiment at night before bedtime, make some predictions, and then wake up and see the walking water rainbow. You could also do this experiment first thing in the morning and then watch it change all day long!
Have fun making a walking rainbow and thinking like scientists!