The Museum Blog
Category: STEAM
Make Recycled Paper Beads
by Meredith Brustlin, CMNH Educator
This is such an easy and fun project and is a perfect one to do during Earth Day week!
Materials Needed:
- Magazines or other scrap paper
- Pencils
- A glue stick
- String
- Mod Podge or DIY Mod Podge (white glue mixed with water)
- This is optional!
Directions:
- Prep this activity by cutting magazines or other scrap paper into long skinny triangles
- Cut the paper vertically to make the longest triangles possible!
- Starting with the wide end of one of your triangles, start rolling it tightly around a pencil
- Sometimes little ones need help with this beginning step!
- Keep rolling until you are about 2” from the end of the triangle--it should just be a skinny little strip left
- Cover that strip with glue and continue rolling to complete your bead
- Wiggle the bead off your pencil
- Make more beads!
- String your beads to make a necklace or bracelet.
If you’d like, when you’re finished with your beads--you can paint them with Mod Podge and let them dry. This will make your beads more secure and sturdy and also make them shiny!
Foil Boats Science Challenge
by Meredith Brustlin, CMNH Educator
Materials needed:
- One piece of aluminum foil per young scientist/participant (roughly the size of a standard piece of paper) Make sure all participants have the same size piece of foil.
- Sink/tub/plastic bin with about 6 inches of water in it
- Weights to put in your boat (pennis work great for this!)
- Optional: other building materials
- Cardboard, tape, straws, popsicle sticks, etc
Directions (prep):
- Fill up your water station (sink/tub/plastic bin)
- Prep materials for each scientist participant--make sure they all have the same materials to use for their project
- Collect boat weights (ex. pennies)
Directions (activity):
- Explain to your young scientist(s) that today you will be making boats!
- Challenge them to make a boat that they think will hold the most weight and not sink using the materials provided
- Test your boats by putting them in the water and gradually adding weight!
- Feel free to re-design and test again.
The Science:
- We are seeing two forces at work in this science experiment: gravity and buoyancy!
- Gravity: gravity is trying to pull your boat and pennies downward towards the center of the earth
- Buoyancy: buoyancy is pushing the boat towards the surface of the water!
- Your boat will float if the force of buoyancy is greater than the force of gravity.
Upcycled CD Scratch Art
by Meredith Brustlin, CMNH Educator
This is a super cool activity that can be done with materials you have at home that you may have thrown away otherwise!
I like this activity because it also introduces an easy way to talk to your little ones about recycling and upcycling. You could start this activity with a short discussion. What does it mean to recycle? What do we recycle in our house?
What do you think it means to UPcycle? This word will probably be new to them! When we recycle, we take items like plastic bottles and send them to the recycling center. From there, they are melted down to become the same item again or something new and different! Did you know plastic bottles can be recycled to become fleece jackets, carpets, and sleeping bags?!
UPcycling is taking something just as it is (in our case here, a CD) and turning it into something fun and new using just our hands and our creative minds! Upcycling projects tend to become beautiful works of art. Ask your little ones if they have upcycled anything before? Or maybe projects you’ve done together as a family? Projects they may be familiar with would be things like tire swings or milk carton birdhouses.
Enjoy exploring upcycled CD scratch art together!
Materials Needed:
- Old CDs or DVDs (it’s fine if they’re all scratched up!)
- Check out your desk for old computer software--the CD I used was an ancient program from the digital camera I had in college!
- ACRYLIC paint!
- I know it’s not washable which is tough with little ones--but it does need to be acrylic for this project so it sticks to the CD.
- Items to scratch the CD with
- Chopsticks, forks, keys, paperclips, etc.
- Some kind of string or ribbon if you would like to hang up your scratch art CD!
Directions:
- Invite little ones to paint their CDs!
- Be sure to paint on the shiny side of the CD, not the side with writing/text.
- It’s best to paint the CDs one color, or blocks of color. Since the idea is to create scratch art on the CDs, if you paint pictures of flowers or dogs or houses---they will look odd after you have also added scratch art to them.
- This is the hard part--wait for the paint on the CDs to totally dry.
- If you have enough CDs, you can experiment with scratching them while they are still wet and then compare with the CDs you scratch when they are dry.
- Once the CDs are dry, use the scratch tools to create designs on them!
- Add a string or ribbon and hang your CD in a window to create a beautiful suncatcher!
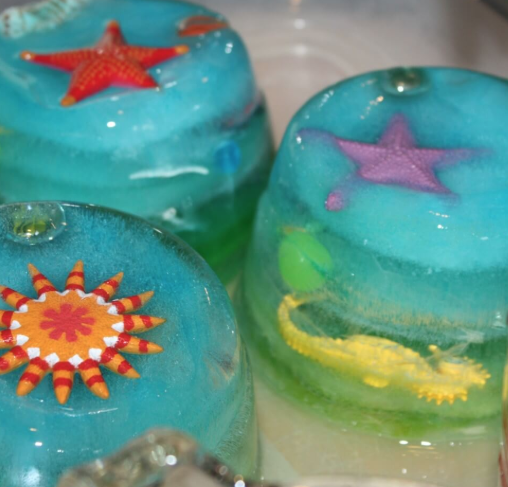
Ice Exploration!
By Meredith Brustlin, CMNH Educator
Materials Needed:
- Bowl(s) or container(s) that are freezer safe
- Fun items/trinkets to freeze (small plastic toys, rocks, coins, etc)
- Food coloring (optional, if you want colorful ice)
- Spray bottle
- Salt
Directions (prep):
- Collect small trinkets and items from around the house and place them in a bowl or container
- Fill the bowl or container with water
- Add food coloring, if desired
- Freeze at least overnight (depending on the size of your container)
- Fill a spray bottle with water & a few spoonfuls of salt, shake!
Directions (activity):
- Take the container out of the freezer and turn it upside down on a cookie sheet, tray, or large dish
- Once the ice has unstuck from the container, remove the container and invite your young scientists to play!
- Direct them to spray the ice with the spray bottle. You can also have some other salt available that they can use to help melt the ice.
- Try to free some of the trinkets!
The Science:
- There are so many angles that you can take for discussing the science of this project.
- The water: it changes from a liquid to a solid when we put it in the freezer! While you melt the ice with the salt water, it changes back into a liquid again! That’s two states of matter, can it become a gas? (Yes! Water vapor!)
- The melting: Salt lowers the freezing point of water. Ice melts faster when salt is added as the salt lowers the freezing point of the ice, this is known as freezing point depression. The more salt you add the lower the freezing point. This is why we use salt on roads in the winter to help melt the ice and make them safe!
The following Wee Ones video is designed for preschoolers and is all about "Melting" and would make a good video to watch together while doing this experiment!
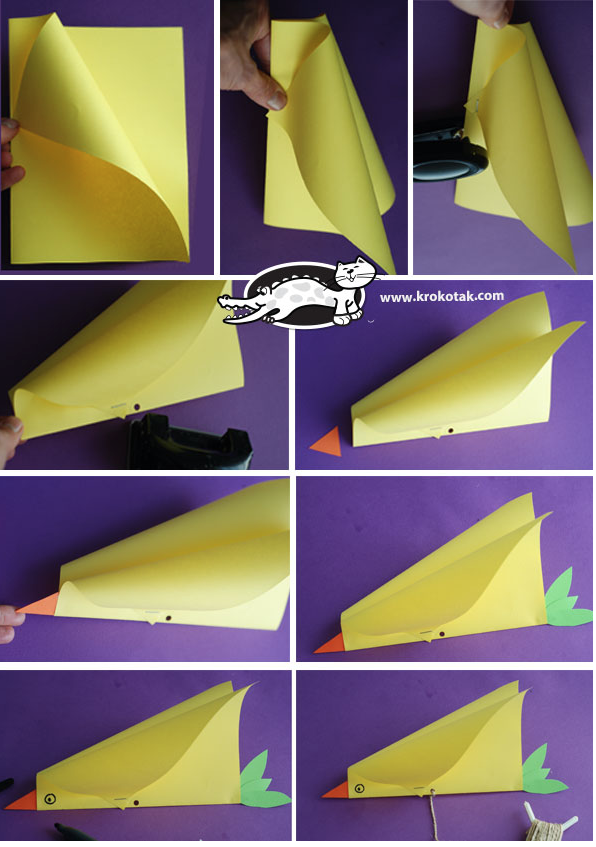
Make a Bird Kite!
by Meredith Brustlin, CMNH Educator
The craft I have to share with you today is making a bird kite! This is a really simple activity that you can do with a handful of household items - and it will (hopefully) supply your little ones with a whole bunch of fun.
This awesome activity was found on www.krokotak.com - browse their website for a variety of other fun activities that use simple materials you can find at home, mostly paper!
Materials Needed:
- Piece of 8.5 X 11 paper
- 2-3 Sticky notes
- Or pieces of colorful scrap paper and a glue stick or tape, I like the sticky notes because they are self adhesive!
- Stapler, scissors, hole punch
- Markers, stickers, any other decorations you’d like
- String/ribbon/yarn
Instructions:
- Fold a piece of paper in half
- Gently “swoop” down both sides to form the wings of your bird and attach with one staple
- Punch a hole on the bottom for the kite string
- Cut a sticky note to make a beak and tail feathers--feel free to add other decoration using markers
- Add some sticker eyes
- Attach the string - you’re ready to fly!
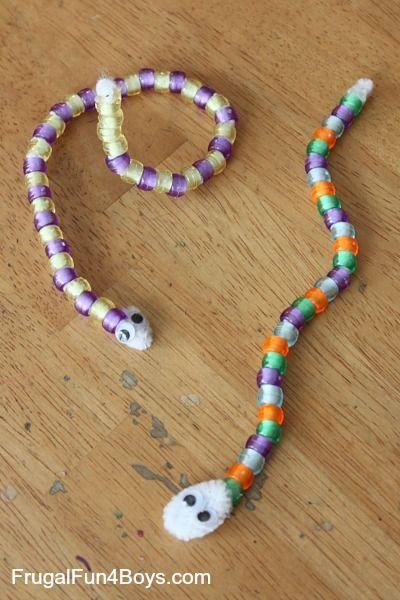
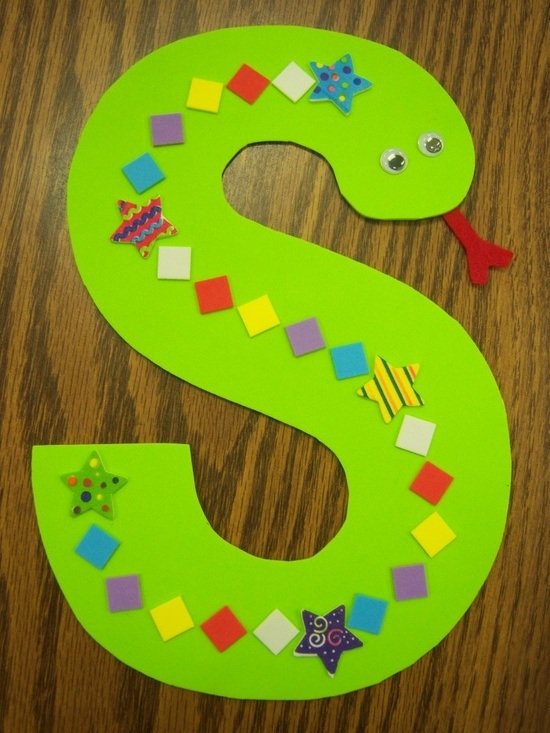
GAME: Pattern Snake Hide and Seek

By Colie Haahr, CMNH Educator
This is an active game, but can be done with no running, indoors or outdoors!
Kids love hiding things and finding things, so this is a game that can last for quite a long time, and can be played with just two people or more.
Set up: First, have each player create a snake. You can use pipe cleaners and beads to make a pattern snake. If you do not have materials available to make a pipe cleaner snake, you can color a snake instead by drawing a snake, having your child draw a snake, or using a template.
Game play: Once everyone has decorated or put together a snake, take turns hiding and finding them. There are a few different ways to do this. If younger kids are playing with older kids, a variation that works well is to have a grown up hide all of the snakes, and kids can search for and find only their own snake. This makes the game more fair in that one person will not find all of the snakes right away.
Rules:
- Use your own house rules for hide and seek: this usually includes no peeking while someone is hiding or hiding items!
Explore more:
Add to the fun: have a “pattern pageant” with a grown up as the judge. Inspect the patterns, ask kids to come up with hidden talents for their snakes, and choose a snake as the winner. Maybe it’s the snake that would blend in best in the natural world, the one with the best pattern, or the child who didn’t do so well in the hide and seek game ;)
Talk about why animals have patterns in nature. Usually, this is to send a message to other creatures, such as “I’m dangerous!,” or to help the animal blend in to stay safe from predators. Some animals have patterns that mimic other things, allowing the animal to appear larger than it really is, or blend in with a different group of animals. Elementary aged kids could do some independent research to see who can find the animal with the best camouflage!
Try this printable paper chain python activity:
If you do not have a printer you can make a paper chain by simply cutting up strips of construction paper or copy paper.
Try this printable spiral snake:
Kids can color it in, but may need help from a grown up to cut it out. These would be neat to hang from the ceiling once completed!
This is a very similar activity, but involves finger painting the snake to create a pattern:
You could also make a pattern like this using the CMNH Wacky Art bubble wrap painting method.
Two Ingredient Snow Dough
By Colie Hahr, CMNH Educator
Our most popular drop-in STEAM activities at CMNH seem to involve making messy mixtures! From slime, to dough, to puffy paint most kids love getting their hands a little dirty, and enjoying a sensory experience while they play and create.
One of the easiest make-at-home messy projects is two ingredient snow dough. It’s part science experiment and part sensory play, and honestly just a bit messy compared to the wild world of slime!
Materials:
- Table cover of some kind (a trash bag works!)
- Corn Starch
- Hair conditioner -white works well
- Mixing bowl
- Measuring cups
- Mixing spoon
- Optional: food coloring, cookie cutters, placemat or tray for play, playdough accessories
Dough recipe: this dough has a one to two ratio of liquid to solid ingredients, so it is easy to double or halve the recipe:
Ingredients:
2 cups cornstarch
1 cup inexpensive hair conditioner
Food coloring (optional)
Directions:
- Add the food coloring (optional) to the conditioner, then mix in a large bowl.
- Add the cornstarch to the bowl and mix thoroughly. Kids can take turns mixing. Keep mixing with a spoon until the consistency seems like playdough
- If the mixture is too wet, add corn starch, and too dry add a little more conditioner. Avoid handling the dough until it looks nice and smooth- this will help contain the mess in the bowl until it is ready to be handled.
- Play with the dough using cookie cutters, stamps, small figurines, or other manipulatives of your choice. It is washable from most surfaces, but kids should be supervised as they would with playdough
What Happened? Once the dough is mixed together, a whole new material has been created, however, the reaction is complicated because the conditioner includes several mixtures and solutions in its ingredients. A mixture is when two substances are mixed together, but you can separate them back into their individual parts. Trail mix is a good example of a mixture. A solution is a substance where you mix ingredients together, and it’s not possible to separate them. Hot Cocoa is an example kids may understand: once you mix hot cocoa powder with milk or water, can you turn it back into milk or water again?
For this activity, you mixed together two different ingredients to make something new. The corn starch is a solid, even though it is a very fine powder. It’s similar to the shape, size, and texture of sand, so making this comparison may be helpful for kids to understand that something can be solid, but also be made of very small parts. Corn starch is used to help make things thicker for cooking, and it also helped to make the dough thicker and more solid.
The other ingredient is hair conditioner, which is a liquid even though it is very thick. The conditioner helped to make the dough softer and easier to mold. The dough you created is still a solid, but it is able to be sculpted and shaped! The ratio of conditioner to corn starch is what made the dough work. This recipe used a 2 to 1 ratio, so there was twice as much cornstarch as conditioner. Older kids can work on fractions, adding, measuring, and dividing as part of this project.
One way to explain this experiment to kids is to ask them to think about making a cake. When you mix all of the ingredients together to make a cake, the ingredients go through a physical change and create a mixture. When the cake goes into the oven to bake, a chemical change takes place, and the batter mixture turns from liquid into a solid baked cake. It would not be possible to take the eggs, flour, or milk back out of the cake once it is cooked, and that’s part of what makes it a chemical change rather than a physical change. For matter to change, usually something needs to be added such as heat or pressure. We didn’t add heat or pressure for this experiment, so even though the dough was very different from the two ingredients that we put together to make it, it is still a physical change. We did not cook it like a cake, AND it’s not edible, so don’t eat it!
Physical Change: A physical change is a type of change in which the form of matter is altered but one substance is not transformed into another. For example, folding paper to make an origami crane changes the shape and size of the paper, but it is still paper.
Chemical Change: A chemical change is any change that causes a new substance to be formed. For example, if an origami crane were to catch fire and burn, the paper would turn into ashes, a new substance.
Mixture: A substance made by mixing other substances together. For example, trail mix.
Storage: The dough should last for about a month if it’s sealed up in a container. Add a little water to the dough if it dries out, and it will last longer.
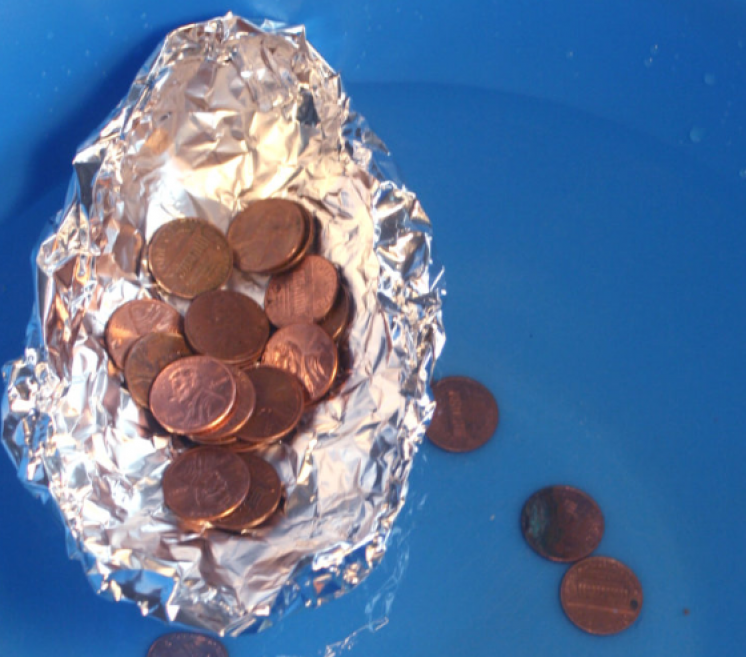
St. Patrick’s Day Treasure Hunt!
Materials Needed:
- Cake pan or other container with deep-ish sides
- Baking Soda
- Vinegar or lemon juice
- Green food coloring
- Spray bottle or small bowl
- If using a bowl, also have a spoon
- Coins/spare change
Prep the activity:
- Place a trash bag or plastic tablecloth over the “experiment area” (food coloring can stain!)
- Spread out the coins on the bottom of your cake pan
- Cover the coins with baking soda
- Fill the spray bottle or small dish with vinegar/lemon juice and green food coloring
Invitation to play:
- Welcome your little one(s) into the science area and explain that some leprechauns stopped by and left a science experiment...and some treasure!
- Invite them to begin investigating---spraying the spray bottle or carefully spooning some vinegar onto the baking soda
- Inquire: What is happening? What do you notice? What do you hear? Why is that happening? What is hiding under the baking soda?!
The science:
- Vinegar is an acid and baking soda is a base. When acids & bases are added together--we get a chemical reaction! A chemical reaction is when you combine two substances and create something new. In this case, we are combining vinegar (a liquid) with baking soda (a solid) and getting a gas (carbon dioxide!) We can HEAR the carbon dioxide being created when we listen for the fizzing/bubbling sound.
Happy St. Patrick’s Day!